Virtualenv Installation Tutorial
Table of contents
- Table of contents
- Assumptions
- Scope of the tutorial
- Why do I need virtualenv?
- How to install virtualenv?
Assumptions
- You are a beginner with programming languages.
- You are learning to code with Python3.
- You read my previous post about how to install Python3 and make it global in your system.
- You want to further your knowledge on building python apps.
Scope of the tutorial
While we are learning how to write code, there are many details surrounding our development environment that we are not aware of. One of those details is virtual environment for Python development. I don’t want to scare you about every single detail. Like all developers, I don’t know the answer to everything, but as you are coming up in your learning experience, I can give you advice about common problems to ease your path in learning how to code. I can’t take all the road blocks out of your way, but I can point out to you few of them.
Why do I need virtualenv?
Virtualenv is a tool to create isolated Python environments. Let’s pretend that you built a Python app to calculate tips for restaurant bills and you happened to use a specific package to build your app. Without noticing, the package only works on Python 3.5 and not Python 3.6. Time passed by and you upgrade from Python 3.5 to Python 3.6. Now you can’t run your tips app.
Why is that? Well… because you built your app without a virtual environment, you were utilizing the global Python installation and all the packages that are in it. Every time you open your terminal and type pip list, all the packages listed after are in your global Python environment. And you might ask… How do I build an app avoiding this very issue? Thank you for asking!
That very issue is what Virtualenv is trying to solve. Even though you have a global Python installation, every time you build an app utilizing virtualenv you create a sandbox, a virtual box, a virtual environment that isolates your application from your global Python installation and even from other virtual environments.
How to install virtualenv?
This section will be short and sweet. There are different ways you can install and use virtualenv in your system but once again, I’m assuming that you have Python 3 install the way I teach in my previous post. So let’s fire the Spotlight Search by cmd+space and type terminal.

You will see the terminal icon at the end of your Spotlight Search, press return. Your terminal window should open and should look similar to mine, like this one…

Now we are going to install virtualenv utilizing pip. Type the following command in your terminal, pip install virtualenv

As you can see in the feedback message, virtualenv is successfully installed in your system.

But… What just happened?
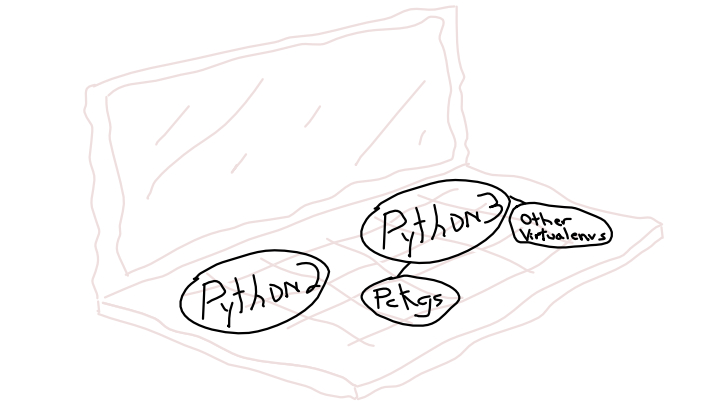
The whole purpose of installing Python the way I did it in my previous post, is to isolate the Python 2 that comes by default with the OX X, and create a new Python 3 global installation in your system. So, globally on your computer you have two Python installations, Python 2 and Python 3. With pyenv we make Python 3 global and we never have to intervene with Python 2. Good!! From this point on, every time we utilize the pip command we are referring to the Python 3 global installation. Therefore, the very command we just ran to install virtualenv, pip install virtualenv, installed the package in your Python 3 global installation.
Now you are ready to build applications inside virtual environments and to ensure that those applications always run. In my next tutorial I will teach you how to actually create the environment and build an app inside the virtualenv.